Last week, she announced on Facebook that she is expecting her second little!!! I am returning the favor and sharing the cloth diaper love and sending her a care package right back :)
I am trying to spend more time in my craft studio (aka The Hobby Room) and having a Pack N' Play in there makes that goal even easier! I started this project with one happy and adorable baby:
Bear with me now, because I know I am weak at writing tutorials, especially with something as complex as sewing... but the gist of this (I tried to take as many photos as possible to explain that way...) is you take two rectangles, fold them in half, sew on a zipper and stitch up the sides. Flip right-side-out and you're done! It's really simple, and I'm about to really confuse a lot of people. So, sorry in advance. I'm the worst at writing instructions because I'm such a visual learner.
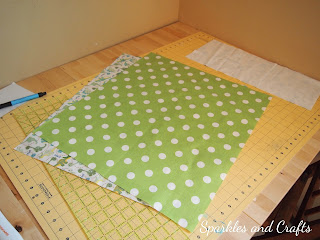
I have made a few wet bags and I've learned now the bigger, the better. Here I didn't even measure, I just used all the PUL I had left and cut a piece of cotton to match. I used a 12" zipper so I made sure the side that would be folded in half did not exceed 12" (I believe the rough size of these pieces was 21" x 25")
I started by pinning the zipper to the outside fabric. The back of the zipper faces up with the right side of fabric.
Once the zipper was sewn on one side, I folded the fabric in half and repeated the identical process to sew the fabric to the other side of the zipper.
Then came lining. I once again repeated the process of sewing right side up (you can see here wrong sides are together) but I was blind sewing along the zipper. My index finger in this photo is on the zipper teeth so I knew where to align my presser foot.
Once both fabrics are sewn to the zipper, I stitched up the side and bottom. Since I just folded large pieces together, once the zipper is sewn on there are only two seams to sew!
ALWAYS pin first!
This shows how the layers are lined up before I stitched.Simple zig-zag stitch along the side and bottom and you're done! Don't forget to unzip part of the zipper so you can flip the bag right-side out when the side and bottom have been sewn together.
And then you're done! I don't know why I took a photo of it with the liner on the outside.... But I will say I forgot to tuck the extra zipper between the layers before stitching it all together, so that's a bummer! This is the third bag I've sewn and every time I learn some other step I need to do next time!
For my friend's gift box I included some Imagine prefolds she handed down to us, the wet bag I sewed, a BumGenius NB AIO, a gDiaper and some disposable gPants liners for those early newborn days.
I'm so excited for her and her family and I love being able to share the cloth diaper love!!! Not to mention it allowed me to go on a trip to the local cloth diaper store for the first time...where I went a little wild buying new covers for Billy too :) Totally worth the splurge!


1 thing that i would like to tell you is you are not week in telling tutorials. you elaborate it very nicely and second thing is you gave me idea for my niece shower gift. i am not good at sewing but i will give it a try for sure you encouraged me. thank you so much. i like the way you pin the zipper to the outside fabric.
ReplyDelete