Showing posts with label Sewing. Show all posts

Sunday, April 26, 2015

Pregnancy: 33 Week Update

0

How far along? 33 Weeks


Size of Baby:  I don't even know. Enormous!?

Weight Gain: See above. 

Nursery: I sewed his crib skirt!!!!!!!!!!!!!!! I sewed. his. crib. skirt. 


I feel so awesome that I did it. I used this tutorial for an adjustable crib skirt. Hubs needs to tack it down because using thumb tacks didn't work and right now it's stuck on there with duct tape... BUT I DID IT. Also: I screwed up the pattern direction. If you look closely, the front is horizontal pattern and the sides are vertical. The quilter in me tried to utilize the most fabric when I cut it all out, then I realized I biffed it hard.... so I just went with it. It's "optical interest" my mom says ;) 

And speaking of Nana - she finished Mo's quilt this weekend too!!! 
I haven't seen it in person yet, but it sure looks stunning from the photos!!!!

Hubs hasn't hung the curtain rods or curtains yet, but hopefully just me writing this line in this blog post will inspire him to do it a day this week after work ;) 

Movement: He's a crazy man. Moving alllllll the time. I can always SEE his movement too, which I don't remember being the case with LW. He's like *right there*. This morning in church I could feel his head down low, his booty up almost to my ribs and his toes wiggling over on my side. He is not small.

Symptoms: I've been feeling really great this week. Like, really great. Part of it may be the weather has been garbage so we've had to stay inside - which gives me a lot of opportunities to keep my feet up and relax vs. chase a toddler. The weather also coincided with LW getting his canines so it's really just been snuggle fest over here. All reasons that I feel pretty great! 

Mo is getting really big and up in my ribs lately though, which is a feeling I did not miss. It makes sitting upright for long periods (ex: dinner) very uncomfortable. 

Cravings: Nothing really. I'm so boring :)

Looking forward to: Snuggling little Mo and seeing LW interact with him. I take a lot of opportunities to snuggle my friends newborns when I can and LW seems to have adjusted to that very well. He listens well and is very understanding when I tell him to back away or be gentle. We're working on the same manners for him and dogs since lately he believes our dog is actually a drum :-X Or a pony. 

Things I can't stop thinking about: We could have a baby. In a month. or two weeks. Or six weeks. Or tomorrow. The end of pregnancy is the most exhilarating time emotionally because anything could happen at any moment. 

Three friends now have had babies in the last week. Two of them were natural births - no epidurals. It's made me think more and more about doing this delivery naturally. Do I want to go naturally? Could I? What are the benefits? Why would I? Just to say I did it? 

Well, for whatever reason I had a flashback of sorts yesterday and the flashback, though totally mental, felt physical. I *felt* the pain of postpartum over again. And that helped reaffirm my decision - I will be getting an epidural this time if time allows it. I don't know that I am emotionally strong enough to brave a natural childbirth (I'm just being honest here) and that wave of pain in my flashback reminded me that epidurals are good. I can have a few hours of not needing to get up to pee. I can not feel that pain for just a few extra hours. I'll know it's there, but I won't feel it. Just for a little while. And if you know me, you know I really love being in my happy place. 

I salute every woman who has their children completely unmedicated. At one time in my life, it was my dream to do so. Now, my dreams have changed. I dream about not having to pee constantly. And being in my happy place :) 

Tuesday, March 31, 2015

Finished Project: Toddler Quiet Book

0

Remember that time I thought I could finish LW's quiet book for Christmas!? HAHAHHAAHHAHAHAHAHAHHAHAHAHAHAHHAHAHHAHHAHAHA. That was good.

Well, now it's Easter and he IS getting the quiet book in his Easter basket. WAHOO!! A finished project. Want to see?

I made it page by page, rather than cutting everything at once then gluing everything, then sewing everything, etc. I like seeing progress and I tend to need instant-gratification when I am working on projects. Working on a page until I finished it in one sitting was both rewarding and efficient for me.

I did learn a few things as I went. The first half of the book took me about an hour per page. I was REALLY obsessed with every stitch and perfecting every cut. The second half of the book took about fifteen minutes per page because I either didn't sew it down at all (hot glue, people! MAGIC) or the pieces I needed to sew were minimal.

From sewing the first half of the book as much as I did, I gunked my sewing machine up pretty badly. The felt letters I used were adhesive backed, which I thought would help them stay extra firm on the book, but in actuality that adhesive screwed up the needles I was using. A little acetone took care of it, but still. Yuck.

Also, felt is a really inexpensive material and with sewing the less expensive the material, the more likely it is to "shed" into your machine.

So, needless to say after sewing this as much as I did my machine is due for a good cleaning.

Here is the cover:
I wanted lots of texture for him to touch and feel and wanted the letters to be big and bold. These are those adhesive letters I mentioned previously. Great for the book. Bad for the sewing machine.
The lion and mailbox spread took me the longest, but they were pages I was most passionate about. I really wanted a lion with a full, unique mane that LW could tousle his fingers through and a mailbox with a "Door" that really opened, plus a flag that really worked. Did them both! And the mailbox has a few surprises inside:
EEP! It's so cute. I used the special stitches on my machine to spell things on certain pages. You can't see in the image, but the lion page says "Lion Says Roar!" and one of the letters for the mailbox says "I love you!"
Then came the Tic-Tac-Toe page. This one took me a while too and was when I decided not to sew those little letters anymore. I stitched a quick little baggie to store the game pieces. These game pieces do not have anything to help adhere them to the felt - they are just sticking with felt on felt.

The caterpillar is a color-matching game. The goal is for LW to match the correct colored pieces to the stuck-on colors on the page. The game pieces have "hook" pieces of velcro on them, so if he pushes them down their little velcro teeth will catch.
This spread was faster than anticipated. The Peek-A-Boo page was just a few minutes to measure and cut the ribbons and fabric plus glue them down.

I worried the fish page would take a long time, but it didn't. The fish all have a tab of magnet on the backs of the pieces, so when he plays it for real it will be magnets facing out. The goal is for him to use the "bait" gold fish which also has a magnet on it, to pick up the other fish with the magnets. There is a little pocket labeled "Fish" to store the pieces in when not in use.
All of the pages are hot glued together and a little mish-moshed around the edges, but to me that just gives character and shows that it's homemade with love. Also, I'm lazy. Felt stretches and these pages were a far cry from their original sizes when I was done with them....so the answer was trim them all down and lose some of my hard work on the game pages or slap them all together and bluff that it's "character". I don't think LW will mind.

I made the back cover in my favorite color with a little love.
I'm thrilled with how it turned out and I can't wait to give it to LW on Sunday to see how he likes it!

Saturday, January 17, 2015

DIY Chevron Metal Locker & New Furniture

2

Slowly but surely, we are starting to furnish our new home. We are decorating this home with the same mentality we decorated the last house, slow and steady. As we find pieces we can't live without that are prices we can't pass up, we buy.

Over time, this is proving to not only be an awesomely affordable method, but we are finding such unique pieces. Our home is such a blend of new and antique in and out...it really inspires me to find even more amazing pieces to put here.

This summer when we knew we would be moving in the fall, we started keeping our eyes peeled at garage and estate sales for anything we felt was special.

Somehow, this locker spoke to me. And I needed it. Also, it was $5.

Look at how sweet and imperfect it is?! How could I say no, especially for $5.

Well, it moved with us and has sat in our garage for months and finally Hubs took the bull by the horns and told me it's time to do something with that locker.

We desperately needed a solution for our toy/book overflow in the family room and this turned out to be the perfect vessel for those items.
Hubs had two weeks off of work around Christmas and New Year's so he worked like a dog and gave our cheap old locker a whole new life. All I did was pick paint and say "I think I want chevron stripes on the front" (which, I realized I"m kind of into chevron right now since I just bought LW chevron curtains but whatever. I'm on-trend, right?!) and Hubs took care of the rest. I am THRILLED with the result and cannot believe how adorable it looks. Plus, it's fully functional for our book storage in the family room. Did you hear me?! I said it's STYLISH, FUNCTIONAL and was AFFORDABLE. That's like, jackpot. Thank you, Hubs. You are the champion of all champions.

Now, this our family room after we organized the books in the locker and moved a majority of the toys into their new home, the living room:
So much nicer!! And cleaner. It's easy to just turn the light off after bed time in the living room and not need to look at the mess. When all the toys were in the family room it felt so claustrophobic. If I didn't pick them up, it was always a mess I had to overlook to watch TV. Now, I just have to toss a few books into the locker after bedtime and I use that teal bucket on the fireplace as overflow toy storage. So if any toys from the living room make their way into the family room, they go in that bucket. It's great!

And - you can see in that photo of the family room that we bought a new chair! We have a Macy's furniture clearance store about 4 miles from our house and we stalk it. Frequently. That beautiful little chair (which I commonly post on Instagram from) Was $150. It reclines and is unbelievably comfortable! It's the perfect chair for pregnancy, too because it's really supportive through my lower back. Such a beautiful thing.

Today, we bit the bullet and bought a couch we'd been stalking for months. We fell in love when we first saw it buying our chair, but didn't want to pay the price they had it marked as. Just by having patience for a few months, we saved $200 on the couch. Meet our $400 little number, which may look familiar :)
Recognize that? It's the big-brother couch to our little yellow $300 couch from the old house. Sure, it's green instead of yellow but we have never shied away from color. Eventually the little yellow couch will move into the new house and sit across this green guy in our formal living room. Here is a reminder;
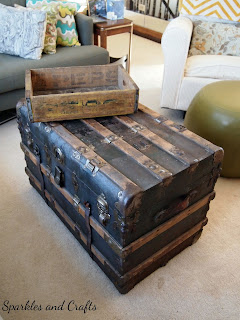
We are hoping to find an occasional chair in a bold, fun print to seat adjacent to these couches in our living room along with our favorite estate sale find to date, our vintage chest coffee table. You can see that here, in one of our listing photos (with the cute yellow couch) in the old house:
And here from an older post:
See what I mean? Vintage and modern, all in one space. It makes my heart go pitter-patter.

The new house is slowly starting come together more and more! It's becoming more "us" all the time, which I love.

Eventually, the living room will be an "adult" space for entertaining and the toys will all migrate downstairs but for now, while we have little to no furniture, LW gets to run wild in there with all of his toys. With me working from home, it works really well. LW isn't big enough yet to play in the basement alone and I surely don't want to work downstairs all day anyway. This way we both get to enjoy all the natural light this house allows during the day and at night I don't have to look at toys and mess.

One more new chair recently came home with us, courtesy of a friend who I love buying hand-me-downs from. I've been wanting one of the Pottery Barn Kids Anywhere Chairs for LW for a while, and she happened to have one to unload. A simple patch over the name and we will be golden :) Or, I may try to find a slipcover for that chair with his name on it in a color that works a little more cohesively in our family room space (greens and browns). We'll see what kind of bargains I fall into.
LW clearly loves it, regardless of what name is on it or what color it is.

Thursday, October 30, 2014

DIY Halloween Costumes: Finding Nemo

0

This year I wanted our family to have a "theme" costume. I know it sounds dorky but come on, it's so cute!! After weeks of researching and trying to find the best DIY costumes, Hubs suggested that LW go as Nemo, his favorite character (we just learned).
Through good 'ole Pinterest I found this tutorial for No-Sew Finding Nemo Costume. I bought brand new hoodies from Kohl's for this costume and I know it sounds ridiculous, but they were really nice and definitely will work for us for the rest of the winter, so I wanted to sew the stripes on and remove them after Halloween rather than hot glue on the stripes and ruin the sweaters.

I used the instructions from this tutorial (same as above link) and bought 1/2 yard of both black and white felt to use for the stripes. I also wanted to make a Dory costume for myself, so I bought a sheet of yellow felt to make my fins and tail.
The whole process was a snap. I simply measured by eyeballing how much felt I needed for each section of stripe and cut with a rotary blade.

I stitched everything together with a long basting stitch (4.5) and that was it! For all three costumes it took me under two hours.

Hubs had the most difficult costume to sew because I bought his hoodie in a high-performance fleece, which had WAY too much stretch. The stretch in that material vs. my machine vs. cheap felt was pretty rough. His costume took the longest and still didn't come out beautifully, but the theme is obvious, especially when standing with LW and I.

My Dory took about 5 minutes and LW's Nemo costume took about 45 min. Dory only used one sheet of yellow felt, a scrap of black and a blue sweater:
For Dory I just tacked those little ovals on the elbows with a few basting stitches for "fins" and used the center of the felt between where the ovals were cut as my "tail". I stitched the yellow to a matching scrap of black felt that was slightly larger so it looked like it had piping.

In total with hoodies and felt materials (I already had needles, thread and a sewing machine) this family costume cost under $40. I used coupons for both Kohl's and Hobby Lobby.

Here are the finished Nemo and Marlin. Full family photo coming soon!
If you're stumped on what to be this Halloween, it's not too late! This costume comes together in no time.

Wednesday, June 4, 2014

DIY Ring Sling!

3

Okay, I have to start this post out by admitting to you all that I am a cheater. I've been using Facebook on my phone through the mobile browser. GAH!!! I am such an addict it's unbelievable. I promised to "Walk the Walk" and I'm totally failing. BUT, it's for good reason, I swear. (Excuses, excuses. I know.) 

Last night a friend and I made our own ring slings!! We used the tutorials from Sleeping Baby Productions and had a ball!

First, I signed up for emails (for clearance alerts) on fabrics-store.com and got this sweet linen for about $5/yard!

The rings are from slingrings.com - I bought two pair of bronze and two pair of silver for Lauren and I. I thought the bronze would accent that warm olive linen well. 

Then I had to wash the fabric and wear it a bit to break it in. 
Followed by ironing it....foreverrrrrrrr. Ironing 5 yards of linen that has been washed, dried, crumpled and worn was not my favorite thing. 
BUT! Then came time to cut the fabric down to size and try it on. It fit!
Following the video tutorials very closely, we sewed our slings with two different shoulder styles. We used the "Eesti" shoulder style and a simple gathered. I didn't take any in-progress photos (bad blogger) but here are both finished slings I sewed! 

Eesti shoulder (a hybrid of a pleated shoulder and a gathered shoulder. Less labor intensive than an all-pleated shoulder):

 Gathered shoulder:

After posting these photos to my thread on the Babywearing DIY and Advice group on Facebook the woman who created the video tutorials and owner/operator of Sleeping Baby Productions commented!!!!!! And gave me a great suggestion for how to wear my slings more comfortably. HENSE why I was Facebooking on my phone. 
And then I freaked out. 

I can't wait to use these slings when I have to run into the store for something, shop at garage sales to keep Billy in one place, or around the house when he simply won't be put down. I have loved my Ergo Performance and Baby K'tan Breeze but I think these ring slings are a wonderful addition to my babywearing "wardrobe". 

Do you babywear? 

Thursday, May 8, 2014

Look Up!

1

Well our month of giveaways + 1 bonus is over and I now have a 1 year old boy. Where does the time go?

Some days I feel like I've accomplished nothing, then I'm still so exhausted by night that the instant Billy goes to bed I sit on the couch like a lump and read my phone. I don't even think anything interesting is shared, but I lay there and stare.

This video has gone viral, and it's very clear to see why. I promise it's worth the 5 minutes of your time.


I say over and over and over again, "I need to be less dependent on my phone. I need Billy to realize there is more to life than life through screens"

Since the weather here has finally become enjoyable I try every evening after work to go outside and enjoy the yard with Billy and Princess. I walk with neighbors and try to have everyone over as often as possible to escape the world of screens.

I think I will start leaving my phone tucked away at night after Billy goes to bed and take out my Kindle instead. Still a screen, but at least my brain will be put to good use rather than reading mush in my feeds. (I do that enough all day!) The nights I have the energy, I will do something crafty and creative with my hands like make cards or sew. Doesn't that sound like more fun than scrolling through your news feed?

How could you start to "look up" and put your brain to good use?

Thursday, March 27, 2014

Dreamy Craft Studio

2

I really wanted to wait to post this until April 1 with the month of giveaways...but I couldn't wait. It's just too wonderful. 

While I should apologize for this post's photo-heaviness, I'm not going to because I feel every photo deserves to be here. 

Welcome to my mom's craft studio. 

My friends like to joke that the creators of Pinterest met my mom, and then created Pinterest because she is Pinterest, but human. 

She is an avid crafter, quilter, embroiderer, card maker, scrapbooker, and knitter. Basically you name the craft and my mom can do it while dancing circles around you.

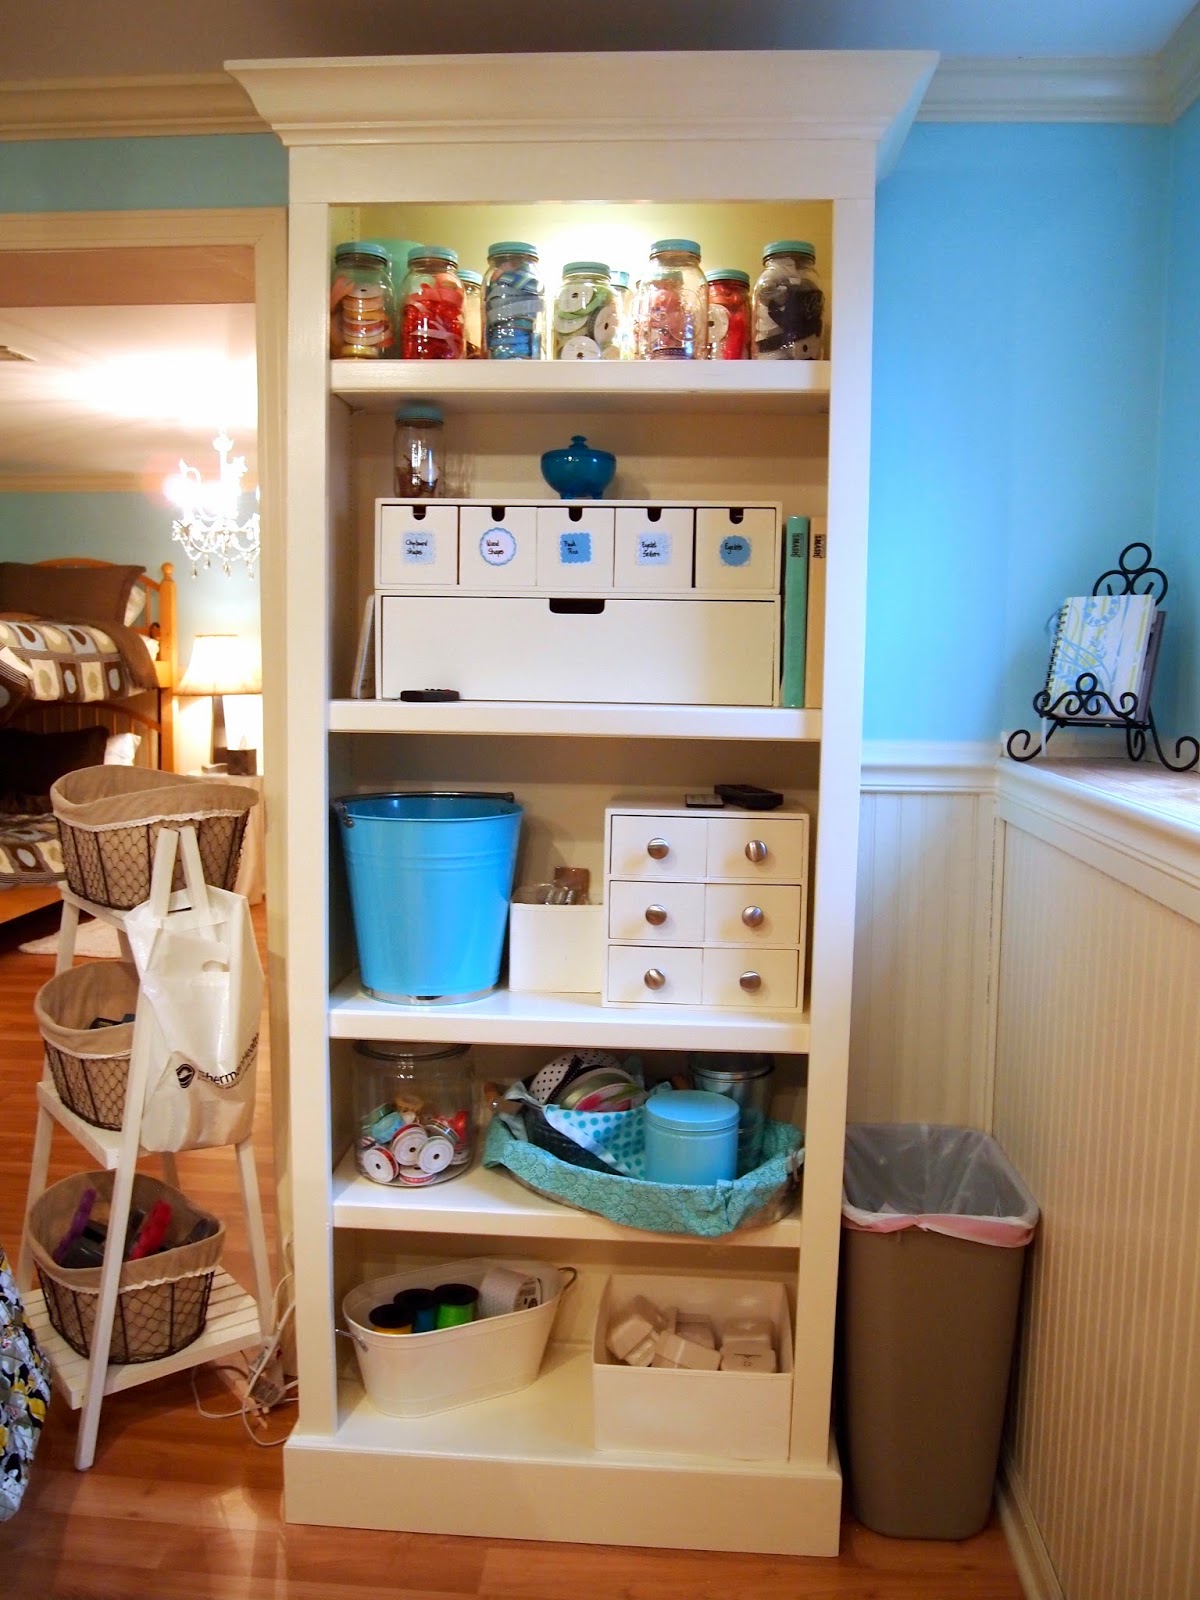
What my mom takes most pride in is utilizing every object to the fullest. You know how chefs like to use the "Nose to tail" mentality? My mom likes to use anything she finds as a storage vessel for something crafty. But not without spray painting it and covering it with perfectly matched paper. See what I mean?
These are soup and veggie cans, reinvented.
TOP: Mason Jars filled with ribbons
She also loves to use inexpensive storage solutions to keep everything in proper order.
RASKOG Kitchen Cart? Nah, perfect for pens and paper cutters!
Simple paper organizer from Staples
This metal utility cart houses her Cricut cutter well, but with all the additional "S" hooks on the sides she gains twice the amount of available storage space. A simple plastic drawer unit organizes a stash of paper and card stock.
Metal utility cart houses her Cricut cutter nicely. 
 ALEX, another great IKEA find, holds her serger on top and houses her needles, thread and some embroidery hoops below.
Think you've seen it all? She's not done yet. She attached hooks to the side of her sewing table with cute little buckets to house her shears.
Obviously, no craft room is complete without a terrier.
Absolutely everything has a place, and everything is labeled appropriately so there is no question what you will find inside every drawer, shelf and jar. 
 She even decorates the space with flair! Glass pitchers are filled with ribbons and an up cycled pickle jar (with spray painted top to tie it into the space) holds silk flower petals for a splash of fun color.
One of her favorite sayings is "Spray paint is your friend!" – You can tie anything together in a space with a little spray paint. If you have odds and ends of jars or containers that don't match, spray paint all of the tops for a unified look.

As if the 650 square feet of craft Mecca wasn't enough, then you experience the "sewing closet".
Are you drooling yet? I used to live here and I still swoon when I walk into this room.