This is a post I've been aspiring to complete since we moved in...The "Final" home tour. It's REALLY photo heavy but here are before and afters of every room in our home!
I looked for a lot of blogs about how others renovated their raised ranches - so I hope this post helps inspire other raised ranch home owners!!
Let's start with the biggest transformation, the mirrors. Before:
After:
The entire main space of the upstairs (this wall, living/dining/hallway to bedrooms) is "Morning Sunlight" by Behr.
Then we walk upstairs into the living room. Before:
After:
The hardwood we chose to match all existing woodwork - it is called
"Dark Mocha Oak" and we got it from Floor and Decor. Normally I prefer lighter hardwood but we did this for cost reasons and it really turned out beautifully. It's much more affordable to match what's there than rip everything out and start over!
Then we go right into the dining room...Before:
And after:
Don't mind the brewing beer on the table...I was not about to lift that 5 gallon sludge to get the "perfect" photo - sorry! I "staged" the house for this photo shoot, but only to a point. I'm human :D
Then we stroll into the kitchen....before:
And after:
The color in here is "Corn Husk Green" by Behr.
The backsplash tile is
Carisma St Croix Stick Mosaic from Floor and Decor.
Which leads us into the bedrooms and bathroom upstairs. Here is our master bath before:
All we did in here is paint. Everything is in pretty spectacular shape, so we let it stay. The color is "Shaker Beige" by Benjamin Moore.
Here is our master bedroom before:
And this is the master bedroom after. Please note that this photo is slightly photoshopped as we have a patch in the paint to do in one corner, so I simply photoshopped the corner to match the rest of the walls. The blue walls are "Smokey Blue" by Behr and the off white is "Beach White" by Behr.
Please also excuse our lack of bed skirt. We can't get one to stay on the bed since Princess loves to rub on it and rip it off...repeatedly. Saving the money and sacrificing finesse.
All we did in here is paint and add a head board - which is a door I found for $40 on Craigslist. Bill cleaned it and hung it. Simple :) The bedding was $9.99 at IKEA and the accent pillows/print on the wall are
Joss & Main* finds (*aff link)
Guest bedroom before:
Paint is the only change in this room also. It is "Shaker Beige" by Benjamin Moore.
Billy's room was the biggest transformation aesthetically I think. That wallpaper....
And now it is "Dolphin Fin" by Behr - my favorite grey in the universe. It is the perfect grey. It's never too dark or too blue. It's perfect.
Now the basement is another pretty huge transformation. First of all, we renovated the stairs from carpet to hardwood. What, everyone else didn't have plastic covered carpeted stairs when they moved into their home?? Just us?
And now. Different angle, but I wanted to show the white risers. I loooooooove them.
The basement bath (aka guest bath) was very neutral before. Not bad, just outdated.
It is much more fresh and modern now. In this room the floors were replaced with new tile
("Bambu Light Porcelain" again from Floor and Decor), walls were painted "Shaker Beige" by Benjamin Moore and the vanity/mirror were replaced.
Just wanted to show the gorgeous wall color in here. So perfectly beige.
The "man cave" is the only room we didn't paint, and it's just the beige that came with the house. Before:
It isn't an actively utilized space so there is new carpet and man-things, and that's about it.
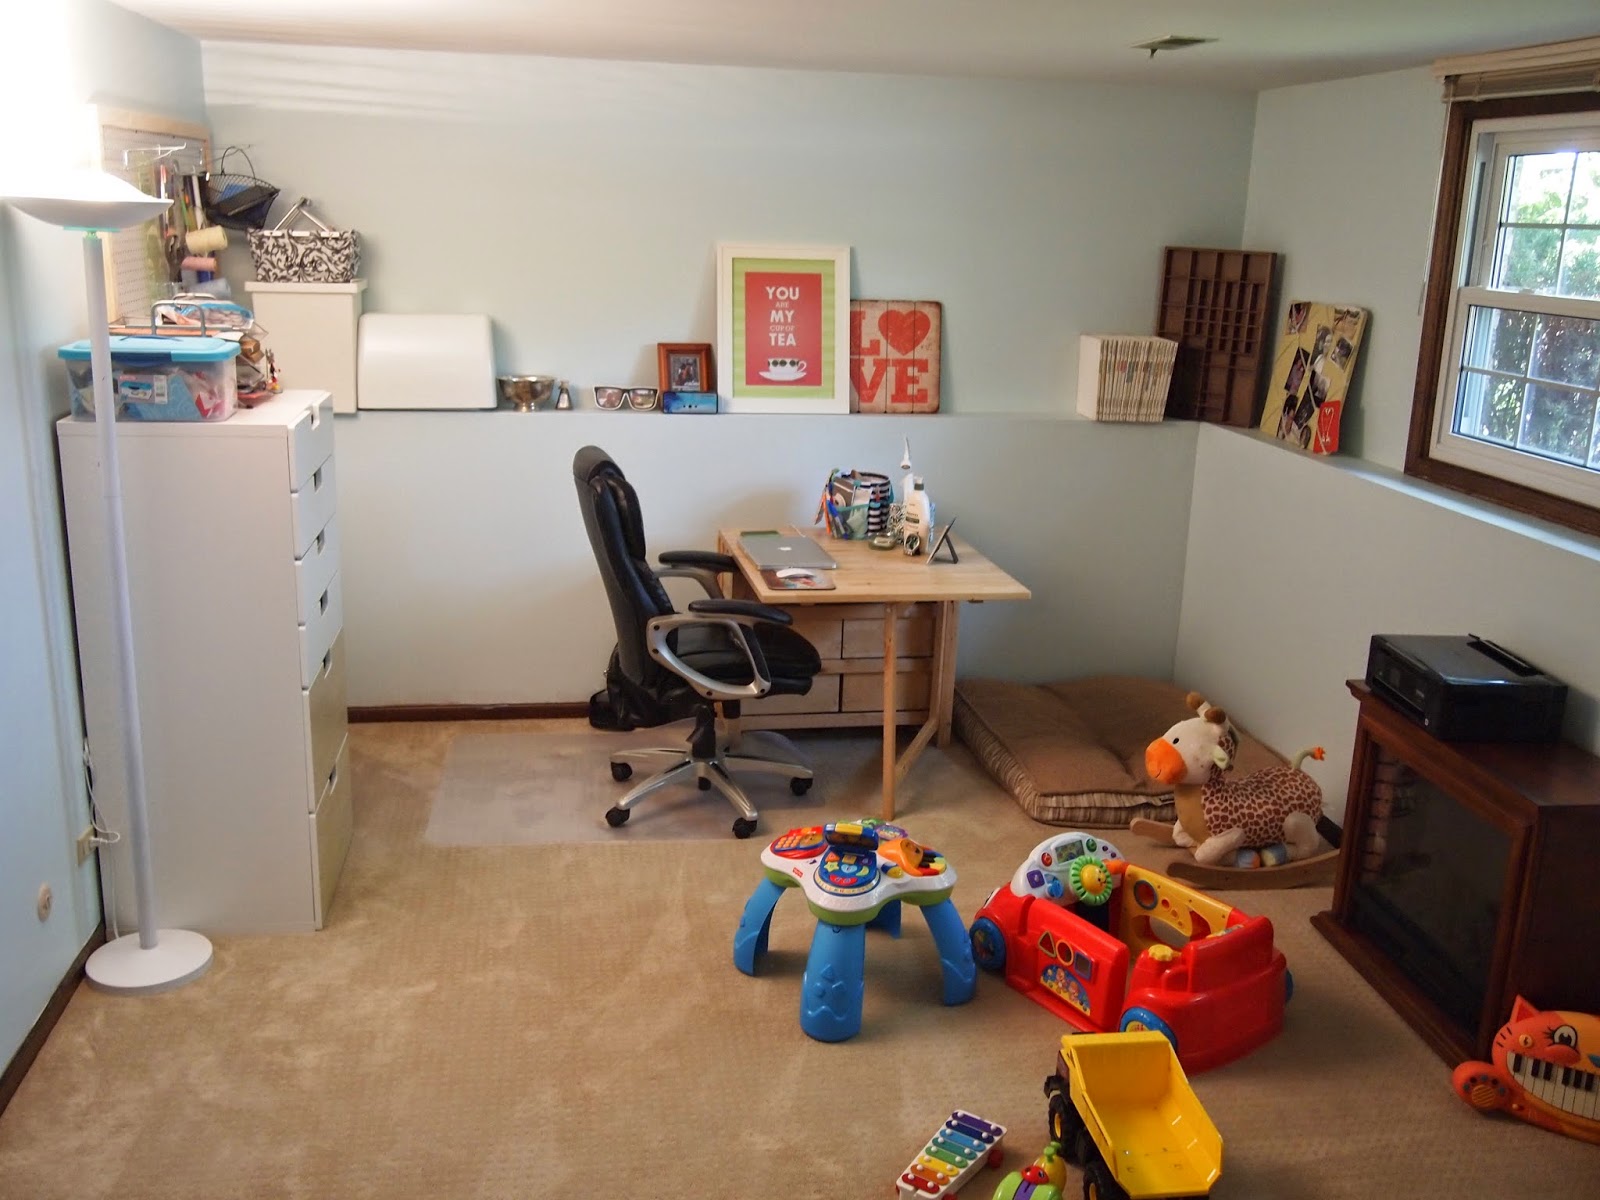
Which brings us to my favorite place in the house, my studio/office/Billy's playroom. Before:
I know you've already seen the after...but I took more photos to share because I just absolutely love this space.
The walls are "Aqua Breeze" by Behr and the accent wall is a remnant bucket of Glidden I got for $7 at Home Depot - the color is almost identical to the "Smokey Blue" by Behr in our master bedroom.
The carpet in the man cave and studio is from Luna..and now I cannot for my life remember the color, brand or finish. Bad blogger!!
But, look at my cute craft nook!! Thanks, Mom & Dad for helping me with this part!!
And finally, our deck! How can I forget? This was the only thing on the home inspection when we bought the house that was a "YOU MUST FIX THIS IMMEDIATELY, OR ELSE!" so it was the very first thing we did when we moved in two years ago. Two years! That's how long it takes to renovate on this scale. TWO. YEARS. People.
The new deck is pretty dang sweet. Billy and I eat every meal outside when the weather permits! Which lately, has been every meal every day!! Love it.
There it is! Our home. I hope it inspires someone to change their space into a happy place :)
My best advice to others who aim to create their happy place is to let it move at it's own pace. Good things take time, and if that means renovating one room step-by-step over time, then that's how it goes! Our kitchen was a multi-step process and all we really did was paint and add backsplash! (and swap out appliances)
I used Pinterest like crazy and I know it drove Bill nuts because I would spend hours on the couch dreaming and building every room over and over and over again, but I firmly believe the end result is better than we could have imagined. It's perfect now :) Hope you enjoyed!


I stumbled upon your blog on Pinterest of course...I have a split level as well (raised ranch/bilevel) and its nice to find some home tours. They are hard to find...trust me! I have more of a cottagey aesthetic but I like your decorating! I will have to check out shaker beige I'm always on the hunt for a good one.
ReplyDelete